3DP is somewhat vain. He loves to makes time-lapses of his print with the help of octolapse. He got inspired by WildRoseBuilds to create a setup for making moving and high quality time-lapses.
First up is making sure the Nikon DSLR D7000 doesn’t need constant battery charges. Instead of buying a very expensive power adapter, we take a cheap replacement battery. We cut out the batteries and connect an external power supply directly to the terminals of the connector. For the flash, a dummy battery print is made. This is connected to an external power supply as well. Even though the flash did not see much action yet, the other camera (webcam) does not seem to like it much. The DSLR is connected through the 3Dprintercontrol rest API on a nearby raspberry pi.
Next is the second camera. A Logitech C310 webcam, which is fitted with a manual focus ring. create the first prototype of the arm on which to rotate the other camera. Using some good old fashioned paper-engineering to find the maximum size, and the Arduino Hero Toolbox swiftly steps in to test it with a 28BYJ-48 Stepper motor.
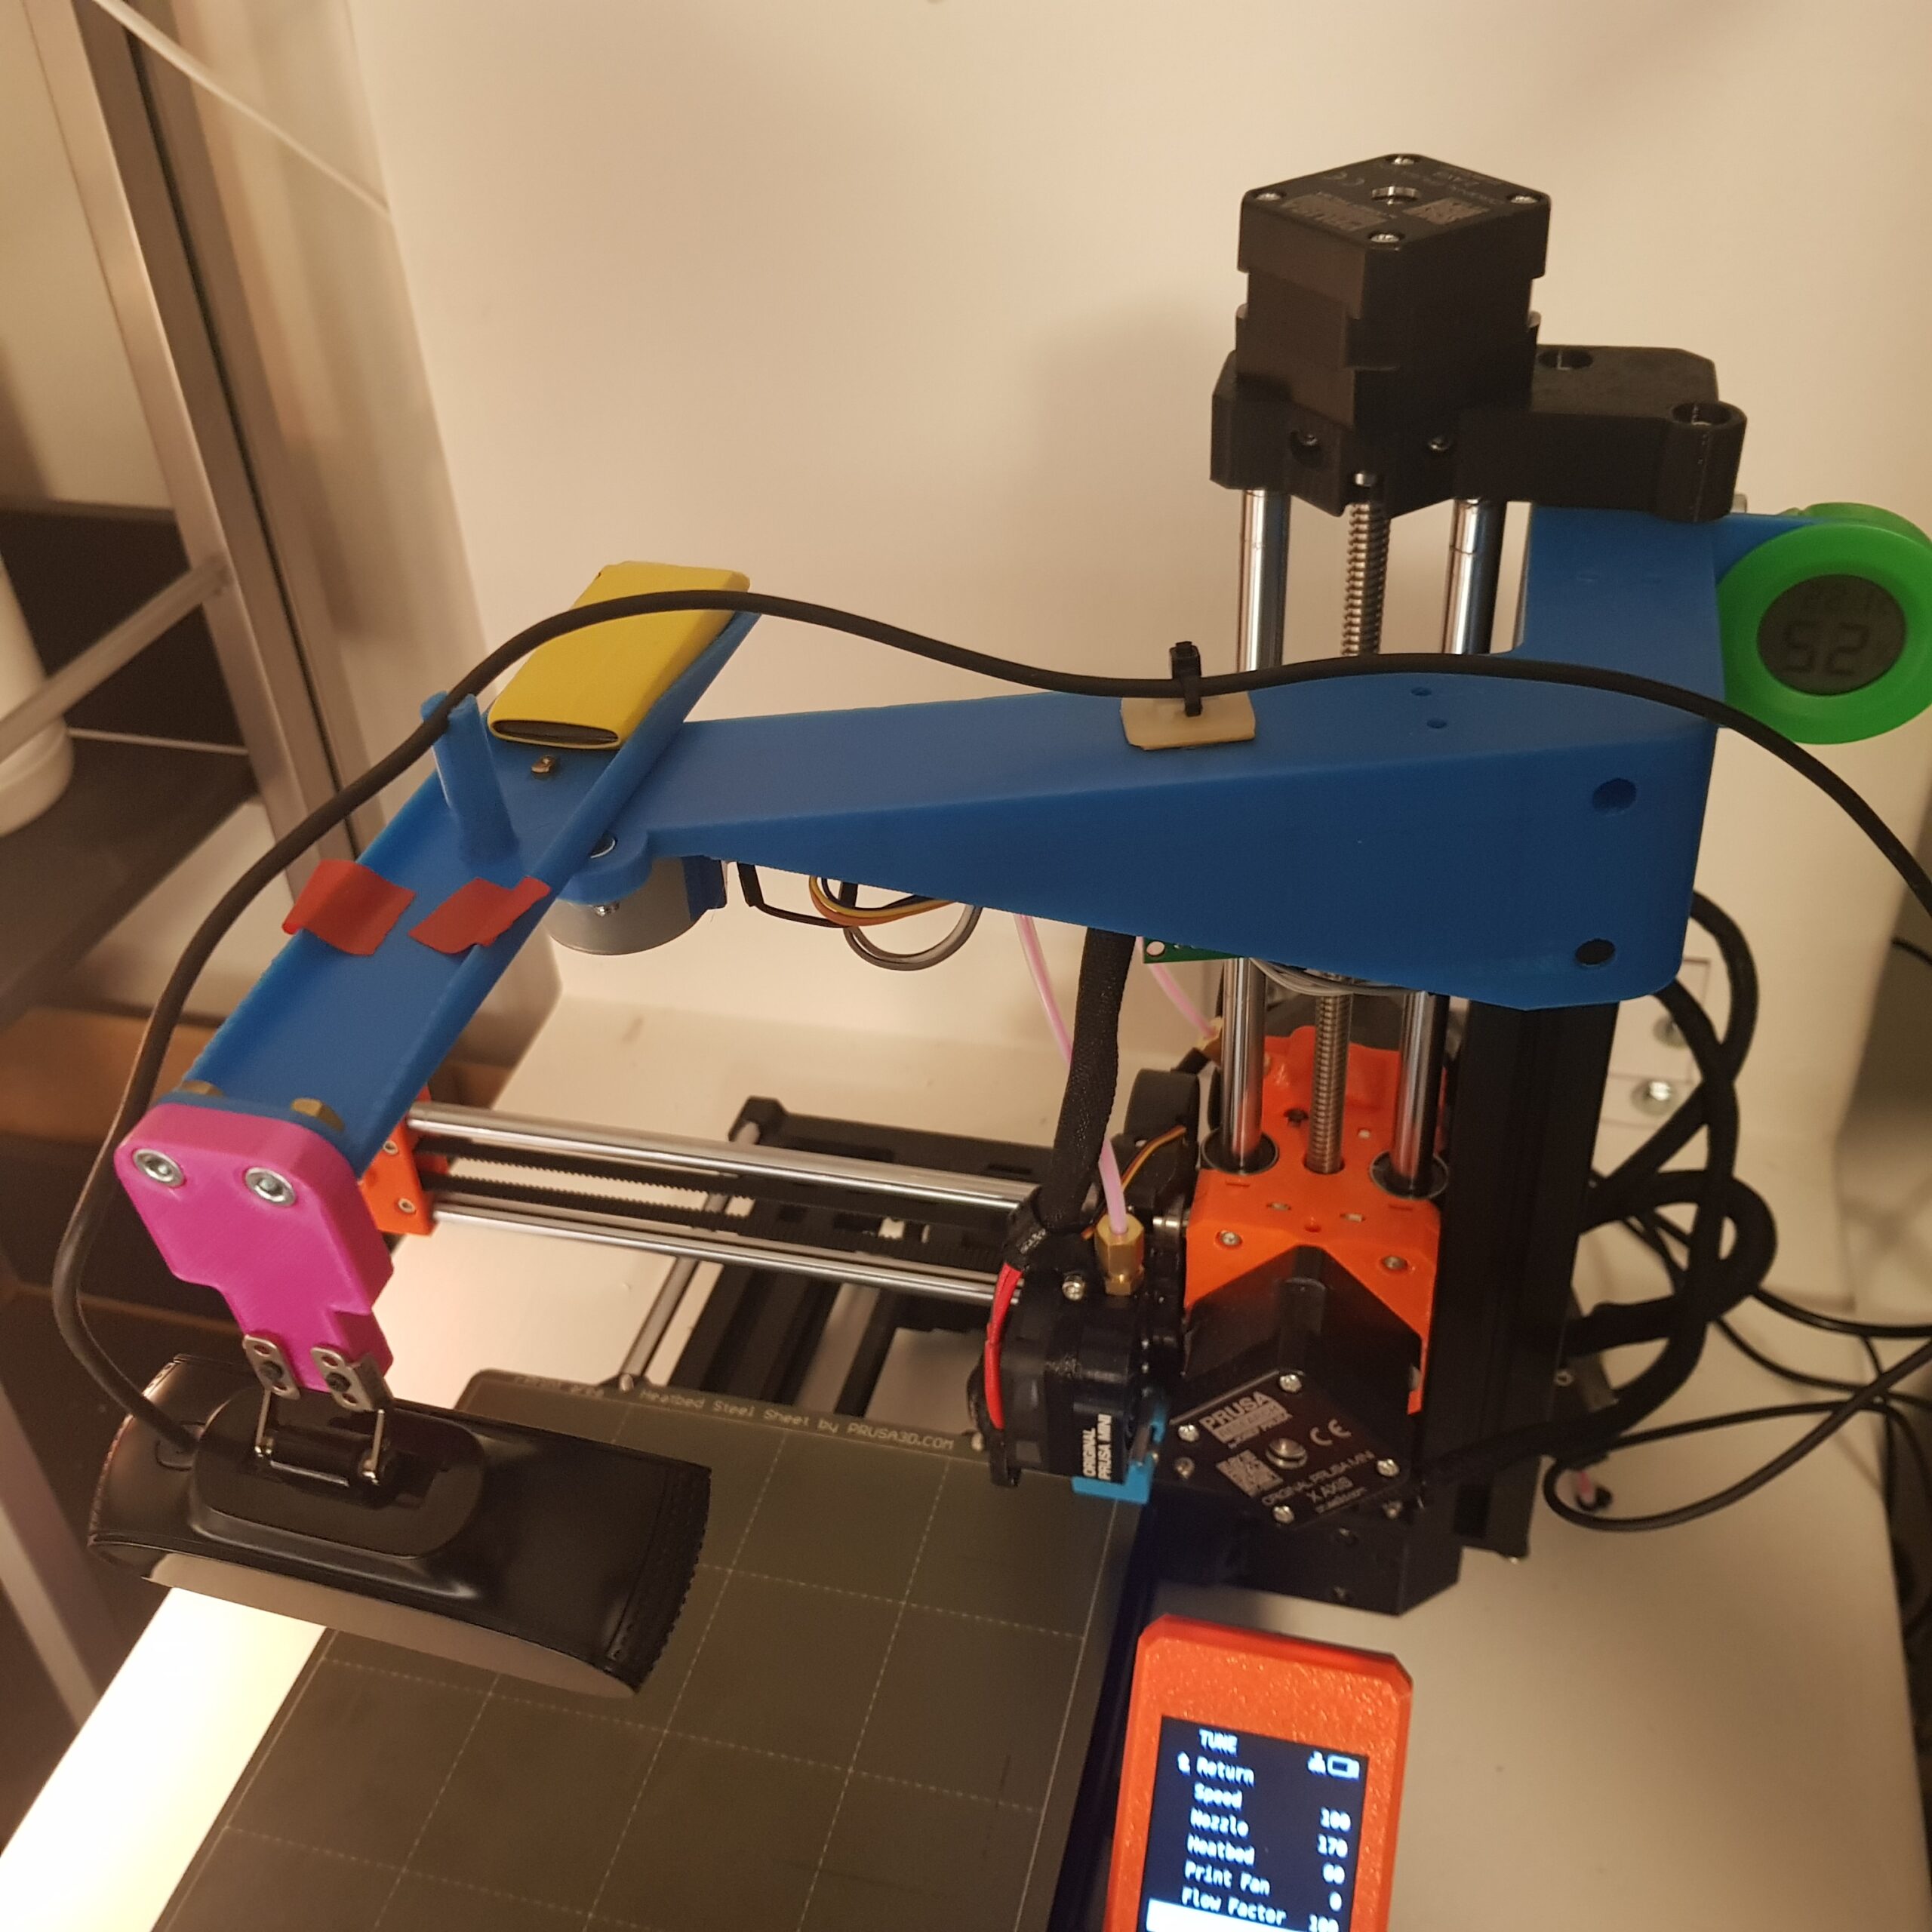
The last piece of the puzzle is the mount for the C310 webcam. A new version of the arm makes for a proper mount. The three parts are combined and palanced with some slices of lead. No shortage of heavy metals on this planet. Find the 3D Model Thingiverse: https://www.thingiverse.com/thing:4668140
And behold, the final mount. To finalize things end stops are needed in the form of reed switches. Magnets are attached to the swing arm and the switches mounted under the static arm. The lead counterweight is needly package in some heat-shrink. The same REST api is used as in 3DP: A new hero and it’s home! Code including arduino is on https://github.com/buildcomics/3Dprintercontrol.
The USB cable is routed on the middle pole of the swing arm. This allows for free movement whilst the arm is turning. The magnets are taped in place. The DSLR is placed center stage, and prints are started.
The quality of the C310 camera is not up to par however. Resolution is low and the field of view too small. Time for an improvement!
Meet our new contestor. The Logitech C910. A full HD camera with good optics. First step is to take the base apart and steel two of the threaded inserts. And put those to good use in the new adapter that replaces the one holding the C310.
And behold, the C910 replaces the C310. The C310 will get a new purpose though, here we mount it to the end of some 1/2″ flexible coolant pipe by.
The other side of the flex pipe is fitted with a 3D Printed threaded mount. This mount bolts straight onto the 3030 aluminium extrusion, and behold, there are all the three cameras. There is also light, now time for some action!
The End


