
A mysterious black package arrives with a new hero! The other heroes come together to provide him with a nice home.


A big black packages marks the arrival of a new hero! It is a Prusa Mini 3D Printer. The new hero nicknamed 3DP is still homeless on arrival though. Furthermore, the Wide Intergalactic Federal Entity (Also known as W.I.F.E.) has serious concerns regarding fire hazards. Even though 3DP is solid and should not pose much of a threat, to fulfill the bureaucratic need of the W.I.F.E. a special control box is designed. The control box cuts off the power to the machine when the smoke detector (Hager TG051A) gives off a pulse. Furthermore, manual and remote control (for octoprint PSU Plugin) is attached. Attempts were made to use transistors instead of latching relays, but after releasing the magic blue smoke from several transistors relays were deemed a better solution and tested on a breadboard.


After testing the control electronics are eternalize on a piece of PCB perf board with the help of Dr. Weller. This is fitted in 3D Printed Housing. Due to insufficient engineering experience, some additional holes are drilled in the lid for LEDs, and the micro switches are glued to the button assembly using plastic shims as risers.


Some labels are added and it’s lights, camera and action for the control box! The connected B has insufficient processing power to run octolapse. The home server is in another room however and cannot be directly connected through USB. Oh dear, what to do?
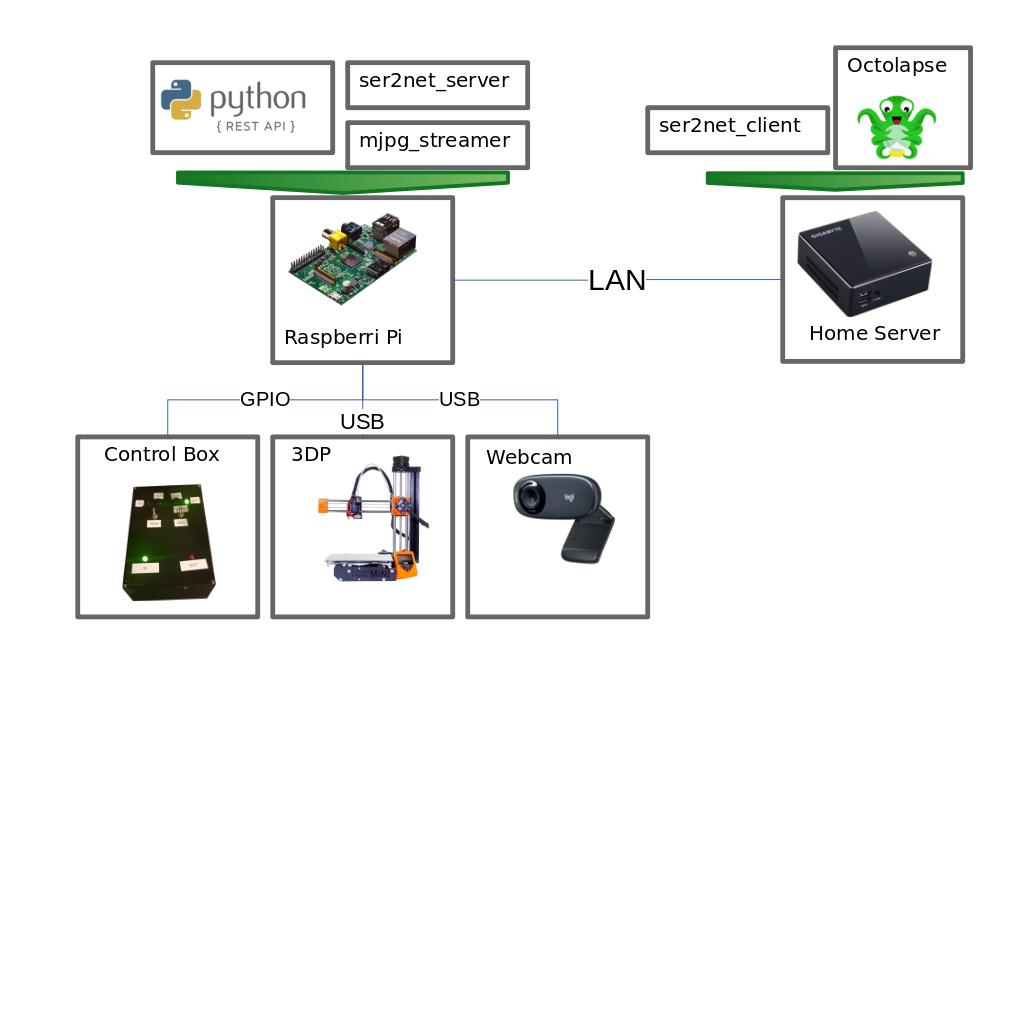


To fix this, we ser2net to provide the serial port of 3DP over the network to the Home Server. Furthermore, we implement a REST API to control the power on/off (and a DSLR camera if needed). Setup, installation and all the code is on GitHub as usual. The Smoke detector is mounted to the ceiling and wired to the control box lastly. Now that the electric installation of 3DP’s new home is finished, it is construction time.


Using the wood pieces and some welded steel square tube the base frame is quickly assembled. To make the assembly fire-retardant, fermacell is used as cladding of the base. And whilst scoring and breaking large pieces of it works well, smaller pieces tend to be problematic. Ouch


A second attempt reveals the same results. Using an (old) handsaw finally does the trick. The fully assembled base stands proud on a workbench in the shed the presentation stage in the universe of of SHared Entities & Devices.


3DP gives his new house “a test drive”. Guy’s, he says, Thank you very much for this great house. And I really think it’s great, and don’t want to complain, but it’s a bit chilly up here. Not to worry says TrS (no family of Mr. TS) and quickly get’s to work on cutting up a few sheets of polycarbonate (aka lexan). Rather than plexiglass (or PMMA), this material is much more flame retardant. The plates are solvent welded using Dichloromethane and a square jig.


A quick testfit of the hinges reveal a challenge. The polycarbonate cabrio roof needs to be “locked” in the open position for easy access. To this end a piece of square metal stock is added with a hole. The enclosure is fitted with a latch with a long handle to allow for opening from the side without needing long thin tentacles to wrap around the enclosure.


Success!. Now the base can be coated in filler and primer to prepare for the final coat. In the mean time a couple of small plates are drilled such that they have half holes in each side. Even more mysteriously, two more are made. But to what end?


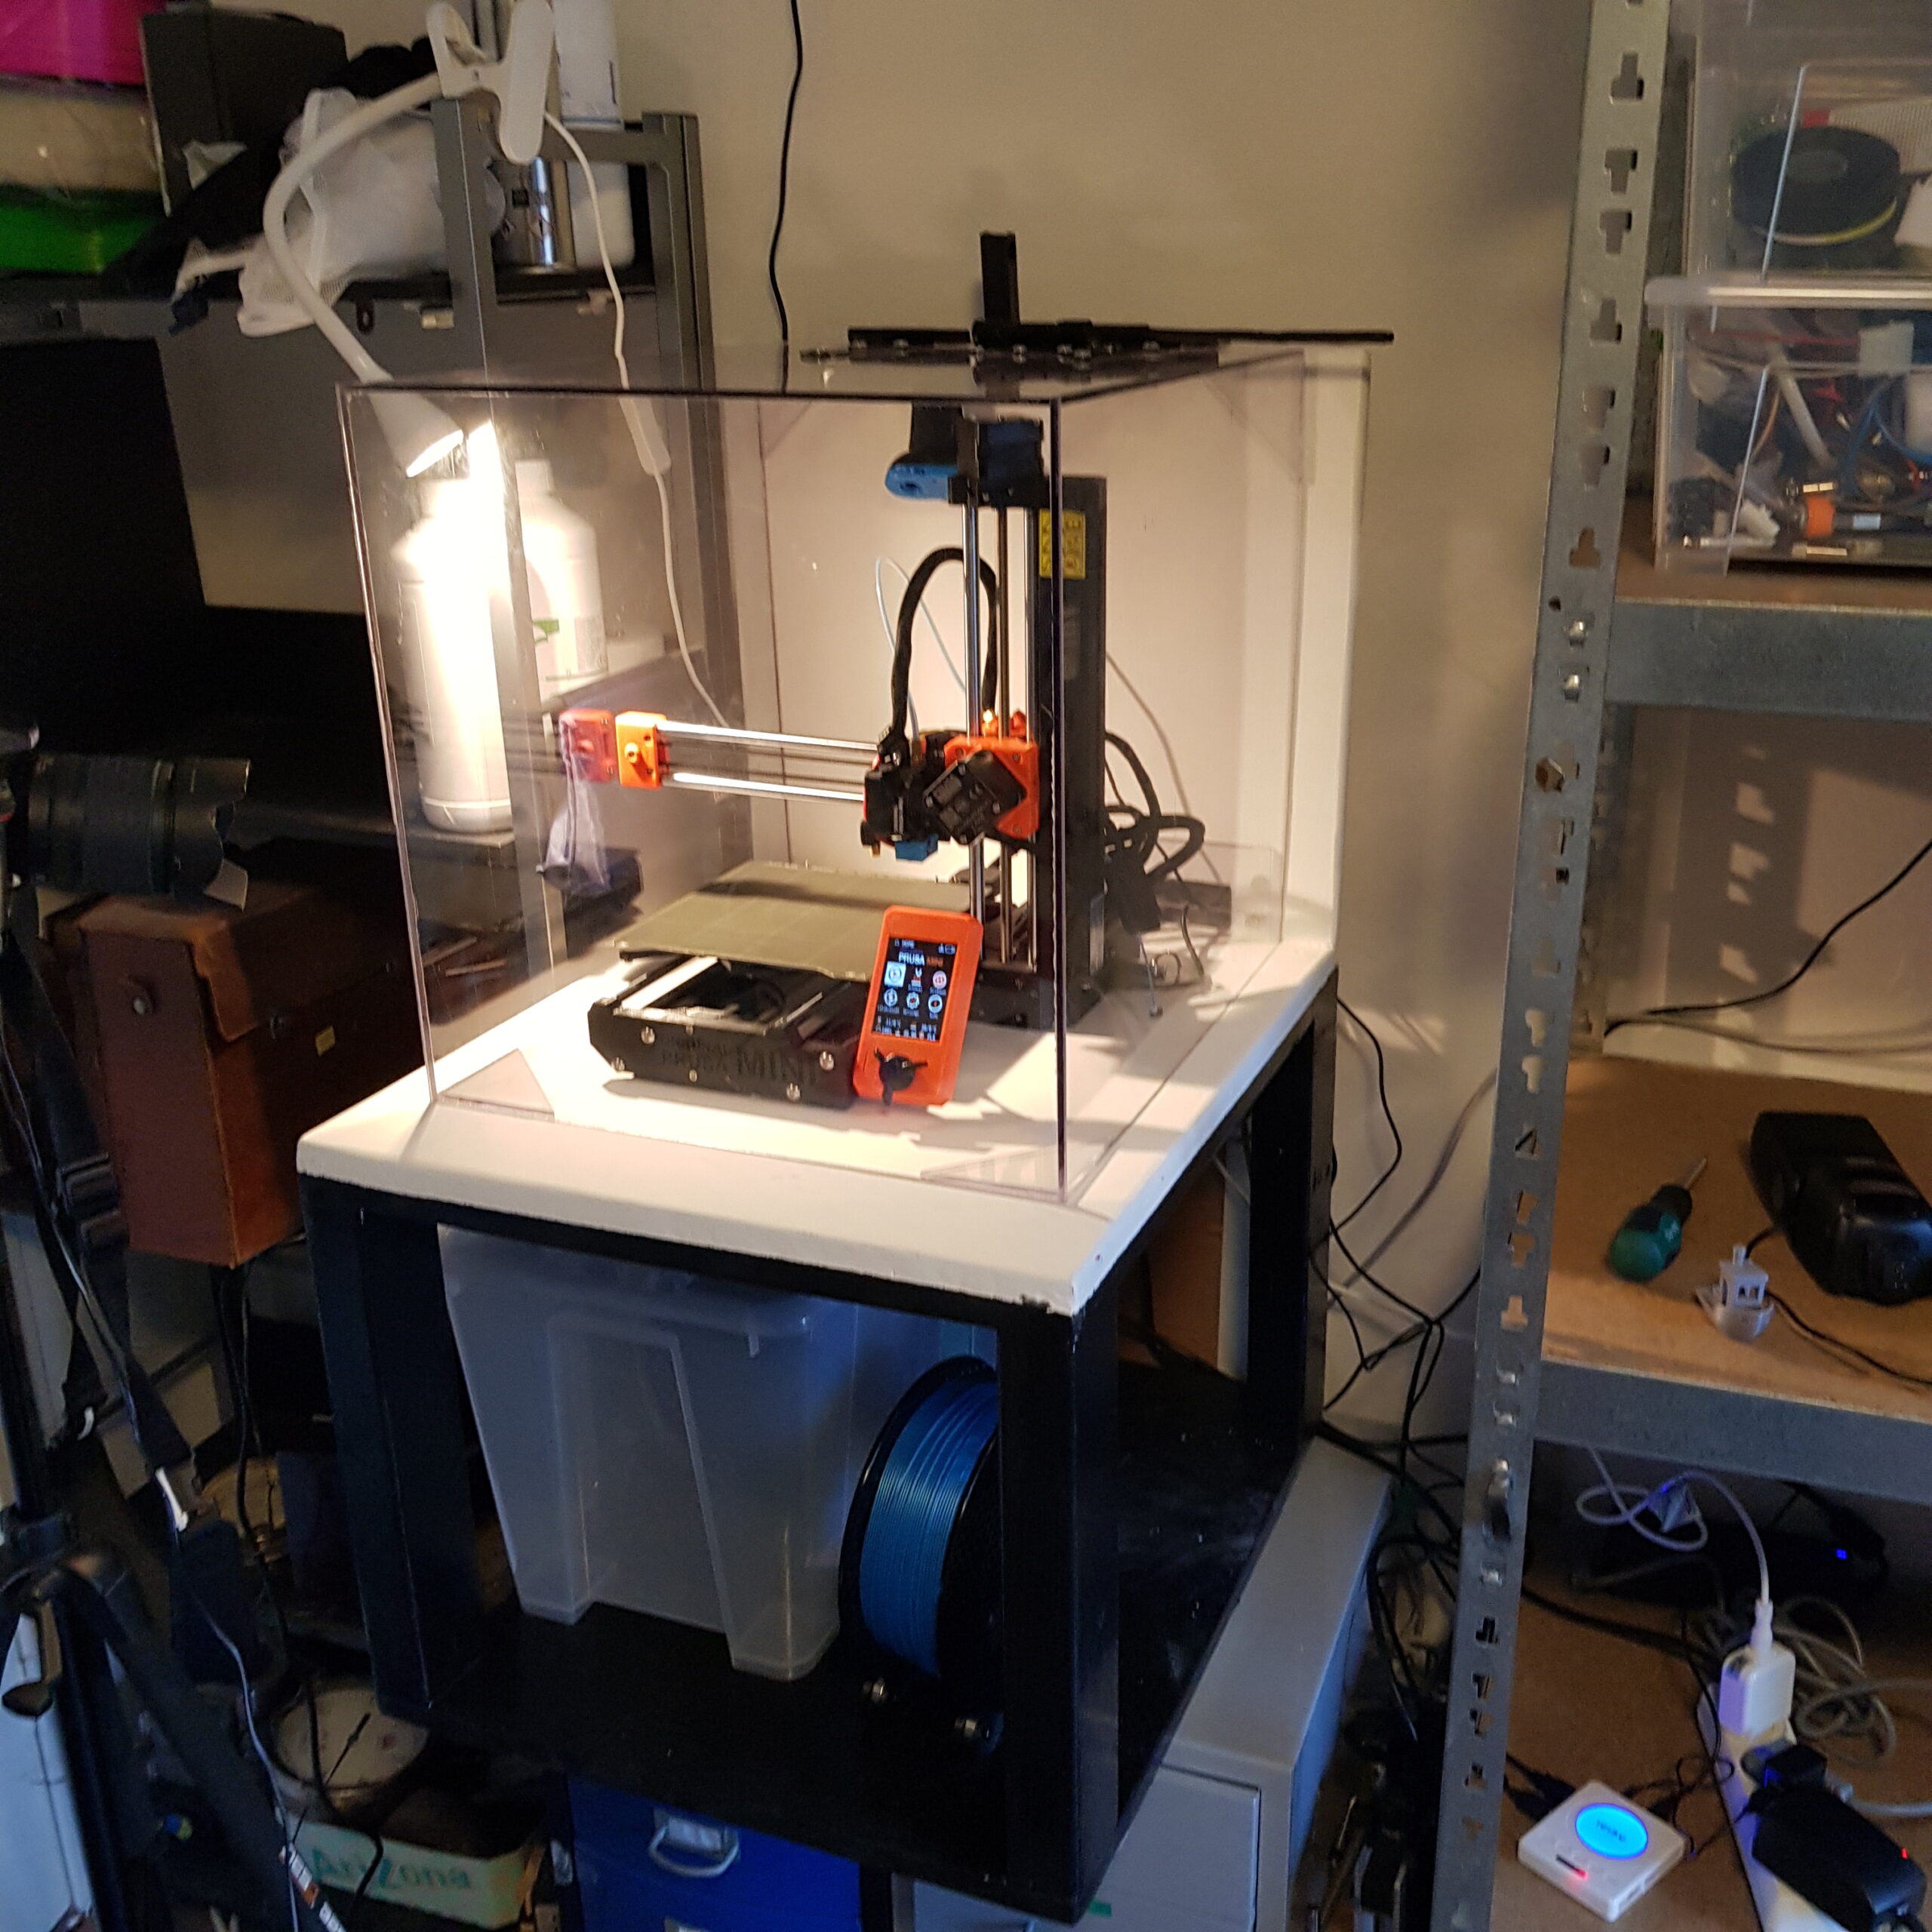
Ah, mystery solved. The plates provide a flame retardant and somewhat isolating cable feed through for 3DP. A small piece of PTFE tube and some zip-ties are used, and 3DP is sitting snugly in his new home! But wait, how will we know the temperature and humidity inside the enclosure? Time for 3DP to do some work on his own.


3DP prints a minimalistic holder for your standard LCD temp/humidity meters. And this is swiftly mounted with some T-nuts to the Z-Axis assembly. The meter pops right in for a sturdy mount. Next up, we need a way to keep the filament dry.


We start off with a 22L box from the city of SAMLA, planet IKEA. The box is fitted with a bespoke 18 mm base plate. On top of the plate, with the help of Mr. Jiggy Saw and a couple of well placed holes, some studs are created. These studs are the base for two 8mm aluminium rods.


The lid is fitted with some sealing foam strip. In the mean time 3DP has been busy printing covers for 608RS bearings. These bearings are snugly fitted with these covers, allowing filament spools to run on top of them.


The bearing assembly for the filament dry box is completed by putting in all the bearings, spacers and covers. Two awesome 3D Prints in the form of a dry-box filament pass-through by Motocoder and PTFE Tube Cap by lichtzeigenanlage are printed to finish off the box. A second LCD hygrometer is glued in place inside, and some hygroscopic silicat gel beads are added into the box. And behold, quickly the humidty inside drops to 15%. That’ll keep ’em dry folks…


Now 3DP has earned his official BuildComics Hero Badge. And after mounting this, 3DP is happy in it’s new cosy and warm home. But for now he is letting the roof off to cool down after a long day of hard work.
The End